Tailscale vs NetBird vs Headscale: Mesh VPN Comparison 2026
TL;DR
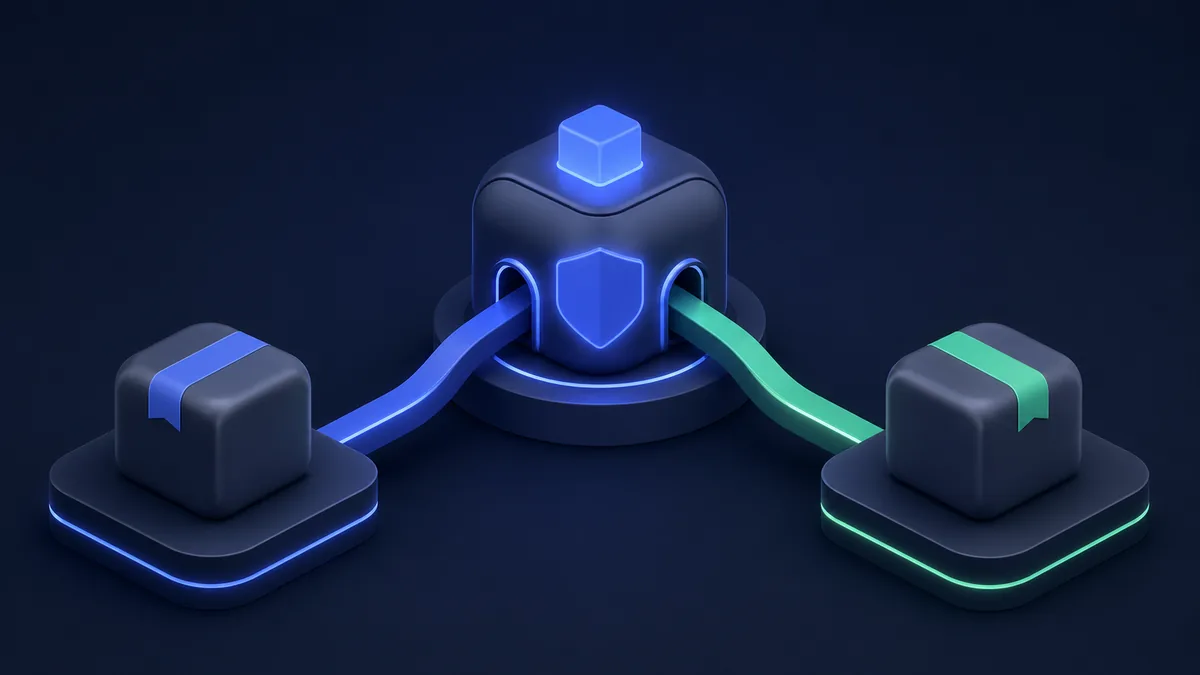
Modern mesh VPNs use WireGuard under the hood but add a control plane for key distribution, peer discovery, and access control. Tailscale is the easiest — sign in with Google/GitHub, and your devices form a private network in minutes. No server configuration needed. NetBird is the open-source self-hosted alternative — same mesh networking concepts as Tailscale but you control the management server and your data stays entirely on-premises. Headscale is the Tailscale control-server reimplementation — run your own Tailscale coordination server while still using the official Tailscale clients. For developers and small teams: Tailscale. For enterprise data sovereignty: NetBird. For Tailscale client compatibility with self-hosted control: Headscale.
NetBird subnet routes and advertise-routes
If your search is specifically netbird up --advertise-routes, you are solving subnet routing, not picking a mesh VPN from scratch. The pattern is: install NetBird on a gateway host that can reach the private subnet, advertise the CIDR from that peer, then approve/route traffic through the NetBird management plane.
Checklist before blaming NetBird:
- The gateway host can reach the target subnet locally without NetBird.
- IP forwarding is enabled on the gateway host.
- The advertised route is the narrow CIDR you actually need, not
0.0.0.0/0unless you intend an exit-node style setup. - Firewall rules allow forwarded traffic between the NetBird interface and the LAN interface.
- Clients have route approval/policy access to that advertised subnet.
| Need | Tailscale | NetBird | Headscale |
|---|---|---|---|
| Easiest subnet router setup | Excellent | Good, more self-hosting knobs | Good if you already run Headscale |
| Fully open-source control plane | No | Yes | Yes |
| Official mobile/desktop client polish | Excellent | Good | Uses Tailscale clients |
Key Takeaways
- Tailscale GitHub stars: ~20k — the dominant mesh VPN for developers
- NetBird is 100% open-source (Apache 2.0) — client and management server both open
- Headscale reimplements only the control server — Tailscale clients connect to it, keeping client UX intact
- All three use WireGuard — the actual data plane is the same high-performance protocol
- Tailscale's free tier: 100 devices — generous for personal and small team use
- NetBird supports POSTURE checks — deny access based on device OS version, running processes, etc.
- Headscale requires running your own server — but Tailscale clients (iOS, Android, macOS, Linux) work unchanged
Why Mesh VPN Instead of Traditional VPN?
Traditional VPNs (OpenVPN, IPsec) route all traffic through a central server — creating a bottleneck and single point of failure. Mesh VPNs create direct peer-to-peer connections:
Traditional VPN:
Device A → Central Server → Device B
(Central server = bottleneck, failure point, 2x latency)

Mesh VPN:
Device A ↔ Device B (direct WireGuard tunnel)
Control Server only handles key exchange — not data traffic
Benefits:
- Lower latency — direct connections, no data backhauling
- No central bottleneck — each pair of devices communicates directly
- Better performance — WireGuard is faster than OpenVPN/IPsec
- Works through NAT — no need to open ports or configure firewall rules
Tailscale: The Developer's Default
Tailscale wraps WireGuard with a coordination server (on Tailscale's infrastructure) that handles NAT traversal, key exchange, and ACLs. Setup takes 5 minutes.
Installation
# macOS
brew install tailscale

# Linux
curl -fsSL https://tailscale.com/install.sh | sh

# Windows
# Download from tailscale.com

# Start and authenticate
sudo tailscale up
# Opens browser for auth (Google, GitHub, Microsoft, or email)
Tailscale ACL (Policy File)
// Access Control Lists defined in the Tailscale admin console (HuJSON format)
{
  "groups": {
    "group:admin": ["alice@company.com", "bob@company.com"],
    "group:dev": ["charlie@company.com", "dave@company.com"],
    "group:staging-server": ["tagged-devices:staging"]
  },

  "tagOwners": {
    "tag:staging":    ["group:admin"],
    "tag:production": ["group:admin"],
    "tag:database":   ["group:admin"]
  },

  "acls": [
    // Admins can access everything
    {
      "action": "accept",
      "src":    ["group:admin"],
      "dst":    ["*:*"]
    },

    // Developers can SSH to staging servers
    {
      "action": "accept",
      "src":    ["group:dev"],
      "dst":    ["tag:staging:22"]
    },

    // Staging servers can connect to databases
    {
      "action": "accept",
      "src":    ["tag:staging"],
      "dst":    ["tag:database:5432", "tag:database:6379"]
    }
  ],

  "ssh": [
    // Tailscale SSH — browser-based SSH without managing authorized_keys
    {
      "action": "accept",
      "src":    ["group:admin"],
      "dst":    ["tag:staging"],
      "users":  ["ubuntu", "root"]
    }
  ]
}
Exit Nodes (Route All Traffic Through Server)
# On the exit node (e.g., your VPS in another country)
sudo tailscale up --advertise-exit-node

# On client — route all traffic through exit node
tailscale up --exit-node=your-vps-name
tailscale up --exit-node=100.64.x.x    # By IP

# List available exit nodes
tailscale status | grep "exit node"
Subnet Routing (Access Private Networks)
# Advertise a private subnet (e.g., your office/home LAN)
sudo tailscale up --advertise-routes=192.168.1.0/24

# Enable IP forwarding first
echo 'net.ipv4.ip_forward = 1' | sudo tee -a /etc/sysctl.conf
sudo sysctl -p

# On client — access the entire 192.168.1.0/24 subnet via Tailscale
# Enable subnet routes in the admin console, then:
sudo tailscale up --accept-routes
NetBird: Open-Source Self-Hosted Mesh VPN
NetBird is fully open-source — both the client and management server. You deploy the management server on your own infrastructure; no data ever leaves your control.
Self-Hosted Server Setup
# Install NetBird management server (Docker Compose)
curl -fsSL https://github.com/netbirdio/netbird/releases/latest/download/docker-compose.yml -o docker-compose.yml
curl -fsSL https://github.com/netbirdio/netbird/releases/latest/download/management.json -o management.json

# Configure management.json
cat management.json
// management.json — NetBird management server config
{
  "Stuns": [
    {
      "Proto": "udp",
      "URI": "stun:stun.l.google.com:19302",
      "Username": "",
      "Password": ""
    }
  ],
  "Turns": [
    {
      "Turns": [
        {
          "Proto": "udp",
          "URI": "turn:yourserver.com:3478",
          "Username": "netbird",
          "Password": "netbird-turn-password"
        }
      ],
      "CredentialsTTL": "12h",
      "Secret": "your-secret",
      "TimeBasedCredentials": true
    }
  ],
  "Signal": {
    "Proto": "https",
    "URI": "https://signal.yourserver.com:443",
    "Username": "",
    "Password": ""
  },
  "Datadir": "/var/lib/netbird/",
  "HttpConfig": {
    "Address": "0.0.0.0:80",
    "AuthIssuer": "https://yourserver.com",
    "AuthAudience": "netbird-client",
    "OIDCConfigEndpoint": "https://yourserver.com/.well-known/openid-configuration"
  }
}
# docker-compose.yml
version: "3"
services:
  # Management server
  management:
    image: netbirdio/management:latest
    ports:
      - "443:443"
      - "80:80"
    volumes:
      - ./management.json:/etc/netbird/management.json
      - netbird_management:/var/lib/netbird
    command: [
      "--port", "443",
      "--log-file", "console",
      "--disable-anonymous-metrics=true",
      "--management-config", "/etc/netbird/management.json"
    ]

  # Signal server (WebRTC signaling)
  signal:
    image: netbirdio/signal:latest
    ports:
      - "10000:10000"

  # Relay/TURN server
  coturn:
    image: coturn/coturn:latest
    ports:
      - "3478:3478/udp"
      - "3478:3478/tcp"
    command: [
      "-n", "--log-file=stdout",
      "--lt-cred-mech", "--fingerprint",
      "--no-multicast-peers", "--no-cli",
      "--static-auth-secret=your-secret"
    ]

  # Dashboard
  dashboard:
    image: netbirdio/dashboard:latest
    ports:
      - "8080:80"
    environment:
      AUTH_AUDIENCE: "netbird-client"
      NETBIRD_MGMT_API_ENDPOINT: "https://management:443"
      NETBIRD_MGMT_GRPC_API_ENDPOINT: "https://management:443"

volumes:
  netbird_management:
NetBird Client Connection
# Install client
curl -fsSL https://pkgs.netbird.io/install.sh | sh

# Connect to your self-hosted management server
netbird up --management-url https://management.yourserver.com \
           --admin-url https://dashboard.yourserver.com

# Generate setup key (from dashboard) and use it
netbird up --management-url https://management.yourserver.com \
           --setup-key "XXXXXXXX-XXXX-XXXX-XXXX-XXXXXXXXXXXX"
NetBird Access Control (Network Policies)
# NetBird policies defined in the dashboard UI or API

# Example policy via API: Allow engineering team to access databases
curl -X POST https://api.netbird.io/api/v1/policies \
  -H "Authorization: Token $NETBIRD_API_KEY" \
  -H "Content-Type: application/json" \
  -d '{
    "name": "Engineering DB Access",
    "description": "Allow engineering group to access database servers",
    "enabled": true,
    "rules": [{
      "name": "DB Rule",
      "enabled": true,
      "action": "accept",
      "bidirectional": false,
      "protocol": "tcp",
      "ports": ["5432", "3306", "27017"],
      "sources": [{"type": "group", "id": "engineering-group-id"}],
      "destinations": [{"type": "group", "id": "database-group-id"}]
    }]
  }'
Headscale: Self-Hosted Tailscale Control Server
Headscale reimplements only the Tailscale coordination server — you run your own control plane while users continue to use official Tailscale clients (the ones they already have on their phones/laptops).
Server Setup
# Docker
docker run -d \
  --name headscale \
  -p 8080:8080 \
  -v ./headscale:/etc/headscale \
  -v headscale_data:/var/lib/headscale \
  headscale/headscale:latest \
  headscale serve

# Or via package manager
# https://github.com/juanfont/headscale/releases
# /etc/headscale/config.yaml
server_url: https://headscale.yourserver.com:8080
listen_addr: 0.0.0.0:8080
metrics_listen_addr: 127.0.0.1:9090

private_key_path: /var/lib/headscale/private.key
noise:
  private_key_path: /var/lib/headscale/noise_private.key

ip_prefixes:
  - fd7a:115c:a1e0::/48   # IPv6 (Tailscale range)
  - 100.64.0.0/10          # IPv4 (Tailscale range)

dns_config:
  nameservers:
    - 1.1.1.1
  magic_dns: true
  base_domain: example.ts.net

db_type: sqlite3
db_path: /var/lib/headscale/db.sqlite

acl_policy_path: /etc/headscale/acls.hujson

# OIDC auth (optional)
oidc:
  issuer: https://your-auth-server.com
  client_id: headscale
  client_secret: your-oidc-secret
  scope: ["openid", "profile", "email"]
Creating Users and Generating Auth Keys
# Create a "namespace" (equivalent to Tailscale tailnet)
docker exec -it headscale headscale users create myuser

# Generate a reusable auth key
docker exec -it headscale headscale preauthkeys create \
  --user myuser \
  --reusable \
  --expiration 24h

# Output: mkey:XXXXXXXXXXXXXXXXXXXXXXXXXXXXXXXX
Connecting Tailscale Client to Headscale
# macOS / Linux — point Tailscale client to your Headscale server
sudo tailscale up \
  --login-server https://headscale.yourserver.com \
  --authkey mkey:XXXXXXXXXXXXXXXXXXXXXXXXXXXXXXXX

# iOS/Android — configure in Tailscale app:
# Settings → Change server → Enter your Headscale URL
Feature Comparison
| Feature | Tailscale | NetBird | Headscale |
|---|---|---|---|
| Data residency | Tailscale's servers | ✅ Self-hosted | ✅ Self-hosted |
| Client apps | iOS, Android, macOS, Win, Linux | iOS, Android, macOS, Win, Linux | Use Tailscale clients |
| Open source (server) | ❌ | ✅ Apache 2.0 | ✅ BSD 3-Clause |
| Open source (client) | ✅ | ✅ | Uses Tailscale client |
| ACL complexity | High (HuJSON) | Medium (dashboard) | Same as Tailscale |
| Exit nodes | ✅ | ✅ | ✅ |
| Subnet routing | ✅ | ✅ | ✅ |
| Posture checks | ✅ (paid) | ✅ | ❌ |
| MagicDNS | ✅ | ✅ | ✅ |
| iOS MDM | ✅ | ✅ | Limited |
| Free tier | 100 devices | Unlimited (self-hosted) | Unlimited (self-hosted) |
| GitHub stars | 20k | 11k | 25k |
| Management complexity | ❌ (managed) | High | Medium |
Ecosystem and Community
Tailscale has built one of the most active developer networking communities in the self-hosting space. The official blog regularly publishes deep technical content on NAT traversal, DERP relay servers, and the internals of the WireGuard coordination protocol. The Tailscale community Discord has thousands of active members, and there are hundreds of community-built integrations — from Home Assistant plugins to Kubernetes operators.
NetBird, while younger, has grown significantly since its rebranding from WireGuard VPN. The project is backed by Infrastructure Security as a Service funding and has contributors from companies with strict data compliance requirements. The GitHub Discussions forum is active with enterprise users documenting complex deployments. The project publishes a managed cloud version alongside the self-hosted option, which validates its commercial sustainability.
Headscale's 25k GitHub stars (higher than Tailscale itself in the open-source category) reflect an enormous community of power users who want Tailscale's client quality with full infrastructure control. The project maintains a compatibility matrix with Tailscale clients, and the community wiki documents every subtle behavioral difference. Several companies have built Headscale administration interfaces (Headscale UI by gurucomputing being the most popular), filling the gap left by the lack of a built-in dashboard.
Related tooling worth knowing: Tailscale Funnel lets you expose localhost to the public internet without port-forwarding — useful for webhook development. Tailscale SSH provides browser-based SSH access recorded to S3, giving you an audit trail for production access. NetBird's posture check system integrates with Crowdstrike and other EDR platforms for zero-trust network access aligned with ZTNA architecture.
Real-World Adoption
Tailscale is the default choice at thousands of startups and mid-size companies. Notable public adopters include game studios (for latency-sensitive developer networking), biotech companies (for HIPAA-compliant remote access without traditional VPN), and open-source infrastructure projects that use Tailscale for CI/CD runners. The Tailscale Kubernetes operator is used in production by companies running EKS, GKE, and AKS clusters where developers need direct pod access without exposing LoadBalancer services.
NetBird is the preferred choice at organizations where regulatory requirements prohibit any traffic metadata leaving their infrastructure — financial institutions, defense contractors, and healthcare organizations subject to HIPAA/HITECH. Several managed service providers have standardized on NetBird for client environments where deploying Tailscale's proprietary coordination server is not acceptable under their security policies.
Headscale sees the most use in home labs, self-hosting communities (r/selfhosted has multiple monthly posts about Headscale deployments), and small businesses that started with Tailscale free but hit the device limit or pricing concerns at scale. Organizations running 200+ devices on Tailscale's business tier at $6/user/month save meaningfully by switching to a self-hosted control plane with Headscale while retaining the Tailscale clients their team already knows.
Developer Experience Deep Dive
Tailscale's developer experience is best-in-class. The CLI is clean and discoverable — tailscale status, tailscale ping <host>, and tailscale ip all behave exactly as expected. The web admin console is intuitive enough that non-technical team members can provision new devices using QR codes or invitation links. The Tailscale VS Code extension and GitHub Actions integration make CI/CD access to private services seamless. TypeScript, Go, and Python SDKs for the Tailscale API are well-documented and actively maintained.
NetBird's developer experience has improved significantly since v0.20. The management dashboard is clean and functional, though it lacks some of the polish of Tailscale's interface. The API documentation is comprehensive and the OpenAPI spec is published, making automation straightforward. One persistent pain point is the complexity of the initial self-hosted deployment — the Docker Compose setup requires configuring STUN/TURN servers, an OIDC provider, and a signal server, which can take several hours for someone new to the project.
Headscale's developer experience is intentionally minimal — it is a control server, not a full product. The CLI (headscale users, headscale preauthkeys, headscale routes) is functional but sparse. Most operators pair Headscale with a community UI like Headplane or headscale-ui. Debug tooling is good — Headscale exposes Prometheus metrics at :9090/metrics and detailed request logging helps trace connectivity issues.
Performance and Benchmarks
All three tools share WireGuard as the data plane, so raw throughput is identical — WireGuard consistently achieves line rate on modern hardware. The performance differences are in the control plane latency (how quickly routing changes propagate) and connection establishment time.
Tailscale's coordination server responds to peer discovery in under 50ms globally, leveraging their DERP relay network in 20+ regions. Direct peer connections establish in 1-3 seconds. When direct connection is impossible (strict NAT), Tailscale falls back to DERP relay at typically 5-20ms additional latency depending on region proximity.
NetBird's self-hosted control plane performance depends entirely on your infrastructure. On a well-provisioned server with co-located TURN servers, peer discovery and connection establishment matches Tailscale. The managed NetBird cloud offering benchmarks comparably to Tailscale for users in North America and Western Europe. For users in Southeast Asia or Latin America, self-hosting with regional TURN servers can offer better performance than either managed service.
Headscale's control plane is lightweight — it handles peer discovery and key distribution only, with data flowing through WireGuard directly. The Go-based server runs comfortably on a $4/month VPS with 1 GB RAM for networks of up to a few hundred nodes. Response time for coordination operations (adding a new node, updating ACLs) averages under 100ms on a well-connected server.
Migration Guide
Migrating to Tailscale from a traditional VPN: Start by installing Tailscale on one machine and connecting it. Enable subnet routing on that machine to advertise your existing private subnet. Test access before cutting over. For teams, use GitHub SSO to provision accounts — existing credentials map directly. The HuJSON ACL file is the main configuration artifact; version-control it in a private git repository from day one.
Migrating from Tailscale to NetBird: Export your device list and recreate groups in NetBird's management UI. The setup key workflow replaces Tailscale's auth keys. Your WireGuard keys are re-generated (NetBird uses its own key management), but the IP topology can be preserved if you configure NetBird's address pool to match. Budget one to two weeks for a team migration, running both networks in parallel.
Common pitfalls with Headscale: The most frequent issue is forgetting to update Headscale when Tailscale releases new client versions — the compatibility matrix must be checked before upgrading clients. The second most common issue is not enabling IP forwarding for subnet routing (Linux sysctl requirement), which affects non-Docker deployments. Finally, Headscale does not support all Tailscale features — notably, Tailscale Funnel, Tailscale Serve, and some MDM enrollment features are Tailscale-proprietary and do not work with Headscale.
Final Verdict 2026
For the majority of developers and small teams, Tailscale remains the correct default choice in 2026. The zero-configuration experience, polished mobile apps, 100-device free tier, and extensive integrations make it the fastest path from zero to a working private network. The coordination server being hosted by Tailscale is a reasonable trade-off for most teams.
NetBird is the right choice when data sovereignty is a non-negotiable requirement or when your organization's security policy requires full control over every component. The operational overhead is real — plan for a day of initial setup and ongoing maintenance — but NetBird's posture checks, full audit log control, and complete open-source transparency make it the professional choice for regulated industries.
Headscale occupies a specific niche: users who already use Tailscale clients and want to remove the dependency on Tailscale's coordination server without retraining users or managing NetBird's more complex deployment. It is the right choice for cost-conscious deployments at 50+ devices where the per-seat pricing of Tailscale's business tier becomes significant, and for power users who value the DIY control plane without sacrificing client quality.
When to Use Each
Choose Tailscale if:
- You want zero server management — Tailscale handles everything
- Your team is small to medium (<100 devices on free tier)
- Ease of onboarding (QR code to join) is important for non-technical users
- You want the most polished client apps across all platforms
Choose NetBird if:
- Data sovereignty is a hard requirement — all traffic metadata stays on-premises
- You need posture checks (only allow access from patched devices)
- Your organization's security policy prohibits cloud-hosted coordination servers
- You want both client and server to be fully open-source
Choose Headscale if:
- Your users already have Tailscale installed and you don't want to change their client
- You want self-hosted control but prefer Tailscale's polished clients
- You're comfortable running a Headscale server and willing to manage it
- Cost at scale (Tailscale charges per seat on paid plans) is a concern
Methodology
Data sourced from GitHub repositories (star counts as of February 2026), official documentation, pricing pages, and community reports from r/selfhosted, r/homelab, and the Tailscale community blog. Feature comparison verified against official documentation.
Related:
Caddy vs Traefik vs Nginx Proxy Manager for routing traffic once your VPN is set up.
Podman vs Docker Desktop vs OrbStack for container tooling that pairs well with mesh VPN development environments.
Cloudflare Durable Objects vs Upstash vs Turso for edge infrastructure that complements private networking.
The WireGuard Foundation
All three tools — Tailscale, NetBird, and Headscale — are built on top of WireGuard, the modern VPN protocol that replaced IPsec and OpenVPN as the performance and simplicity standard. Understanding WireGuard's architecture clarifies what these tools add and why they're needed.
WireGuard itself handles only the data plane: encrypted peer-to-peer tunnels. What it doesn't provide is the control plane: peer discovery, key distribution, access policy enforcement, and authentication. Without a control plane, configuring WireGuard requires manually distributing public keys to every peer and configuring endpoints — workable for 2-3 machines, impractical for a fleet of 50.
Tailscale, NetBird, and Headscale are all WireGuard control planes. They automate the key exchange, peer discovery (including NAT traversal via DERP relay servers), and access policy distribution. The result is that end users can join the network by authenticating once, without manually configuring WireGuard tunnels.
The WireGuard foundation means the data plane performance is identical across all three tools. Once peers are connected, packet routing is handled by WireGuard's kernel module (or userspace implementation on platforms without kernel support). The performance difference between Tailscale, NetBird, and Headscale is negligible — the control plane adds overhead only during connection establishment, not during data transfer.
Enterprise Features
For companies evaluating mesh VPN for production infrastructure, the enterprise feature set matters beyond basic connectivity.
Tailscale's enterprise tier adds SSO integration (Okta, Active Directory, JumpCloud), Device Management features for locking down which devices can join, and a Centralized ACL editor with GitOps integration for managing access policies via code review. The ACL system uses a JSON-like HuJSON format that lets you define which users or groups can access which services on which ports. Tailscale also offers SSH integration — tailscale ssh lets you SSH into machines on your network using Tailscale's identity system rather than managing SSH keys separately.
NetBird's enterprise features include posture checks (verifying device compliance before granting network access), network routes for routing specific subnets through gateway peers, and a full audit log for all network events. The posture check feature is particularly valuable in regulated environments: you can require that devices have up-to-date OS patches, specific software installed, or firewall policies before they can join the network.
Headscale's self-hosted control plane gives you complete audit control by default — all control plane events are in your own infrastructure's logs. The trade-off is that enterprise features like SSO integration and device posture checks require external tooling or custom implementation. Headscale is the right choice for teams that need self-hosted control without requiring advanced enterprise policy enforcement, particularly when the team is already familiar with managing Linux services and comfortable with occasional manual updates to stay compatible with new Tailscale client releases.
Mesh VPN and Container Infrastructure
Mesh VPN tools pair naturally with container development environments. When running services across multiple machines or cloud regions, mesh VPN provides the private network that connects your containers, databases, and services without exposing them publicly.
For teams using Podman vs Docker Desktop vs OrbStack container runtimes, Tailscale has specific container integrations. The tailscale/tailscale Docker image can be added as a sidecar to any container service, connecting it to your Tailscale network and making it accessible to other peers without port-forwarding. This pattern is commonly used for connecting development containers to staging databases, connecting local development environments to cloud services, and creating secure service meshes between microservices. The ts.net package (Tailscale's Go library) enables building services that listen directly on a Tailscale address without requiring the system Tailscale daemon, which is useful for serverless functions and embedded service discovery in microservice architectures.